With a little inspection and regular maintenance, vinyl siding will last for decades. However, occasionally you will need have Vinyl Siding Repair Charleston SC.
Holes, cracks, and dents are invitations for mold and bugs to enter your home, so it’s important to make these repairs as soon as you notice them.
A broken panel of vinyl siding isn’t just unsightly; it can also provide an easy way for insects and rodents to access the interior of your home. In addition, damaged vinyl is unable to insulate your home properly, leading to higher energy bills. Fortunately, fixing this problem is relatively simple and can be done yourself in a few easy steps.
First, use a hammer or pry bar to loosen the nails or screws holding the damaged panel in place. Next, remove the nails or screws and separate the panel from the wall. Once the damaged panel is removed, you’ll need to replace it with a new one that matches the size and style of the existing panels. Luckily, most homeowners have leftover pieces from the last time their homes were sided that they can use for this purpose. Others may be able to find the same type of vinyl siding at a local home improvement store or from a siding supplier.
Once you’ve found the right piece of replacement vinyl, cut it to size and remove the nailing flange at the top of the piece. Apply generous beads of butyl caulk to the area where you’re repairing, and slide the new piece into place. Once the butyl caulk has dried, you can use a zip tool to hook the upper and lower lips of the replacement piece together.
If the new panel is a different color than the rest of your siding, paint it after it dries to hide the patch. It should take about three coats of exterior latex paint to cover the new patch and give it the same look as your vinyl siding.
Keep in mind that fiberglass repair kits can only be used on small holes. For larger repairs, they can cause “puckering” in the vinyl if it expands and contracts at different rates than the surrounding siding. This is why most professionals will choose to replace a section of vinyl whose damage exceeds an inch or two in depth. However, you can still make smaller repairs by simply filling in the hole or crack with a matching caulk.
Patching holes or cracks
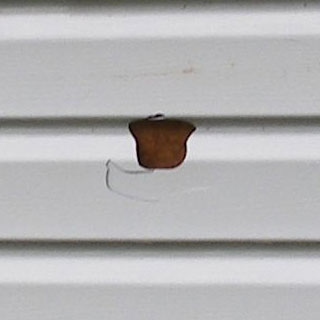
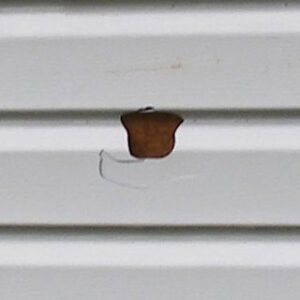
Although vinyl siding is fairly resilient, sometimes stray baseballs or burrowing insects can cause holes, dents, or cracks. These can be a real eyesore on your home’s exterior, but they may also lead to further damage by allowing unwanted moisture into your siding. Fortunately, patching these issues is a relatively easy and inexpensive DIY project that can save you from having to pay a professional.
You can use a caulk designed specifically for vinyl to fill small nail holes and minor cracks. You can find it at most hardware stores or home centers. It comes in a variety of tints, so you should be able to match it to your siding color. Before using the caulk, however, make sure that you clean the area thoroughly with a damp cloth or sponge to remove any dirt or debris that could get in the way of a smooth application.
For larger holes or cracks, you will need to replace the damaged segment of vinyl. To do this, first separate the broken panel from the rest of your vinyl siding. This can be done with a zip tool, which is essentially a hook that you slide underneath the broken piece. Once you have the panel unhooked, it’s a good idea to use a pry bar or claw hammer to remove any nails that are holding it in place.
Next, you will need to cut a replacement piece of vinyl to fit the hole. If possible, you should try to use a piece of vinyl that is the same shade as the one you are replacing. If this isn’t available, you should be able to find a close match at a home center or online.
Once you have the new piece of vinyl, apply a bead of caulk around its perimeter to ensure it adheres well and seals the hole. If necessary, you should use a putty knife to adjust the patch as needed. You should let the caulk dry completely before moving on to the next step.
Once the patch has had a chance to dry, you should paint over it with an exterior latex paint that matches your vinyl siding as closely as possible. This will help conceal the repair and prevent moisture from entering the gap.
Filling holes or cracks
If your vinyl siding has small holes or a few cracks, it is possible to repair them without replacing the entire panel. It is important to repair these areas promptly to avoid additional problems like water intrusion and mold and mildew growth. This may also help with your home’s resale value.
A common method to repair these areas is to use caulking that matches the color of the vinyl. This can be done fairly quickly and inexpensively, especially if the vinyl siding is a common color. However, for more distinctive colors, it will be necessary to order special vinyl caulk, which can be expensive and difficult to find.
Another method is to use fiberglass repair kits. These contain fiberglass strands and resin, which, when mixed with a hardener, can be applied to the damaged area of vinyl. These products are usually available in a wide range of colors and can be purchased at many hardware stores. However, one disadvantage to this method is that the fiberglass takes on the color of the hardener used, which can create a noticeable and unsightly line.
Finally, a very simple and quick method of filling holes or cracks in vinyl is to apply a bead of caulking to the area around the hole or crack. It is important to clean the area and make sure it is completely dry before applying the caulk. Once the caulk has dried, it is easy to remove with a utility knife or a putty knife and to sand the area smooth if needed.
If you are unable to remove the section of vinyl or if the damage is more extensive, it is probably best to contact a professional for vinyl siding repair. In these situations, professionals will have the tools and experience to do a proper job in a safe manner. A professional will also be able to tell you if the damage is beyond repair and can recommend other options, such as replacement or other repairs. When choosing a professional, it is important to choose someone with the appropriate skills and insurance for working on ladders or using power tools such as tin snips or utility knives.
Repainting
While vinyl siding is extremely durable and offers many benefits over other types of home cladding, it can be damaged in the form of chips or cracks. These small blemishes are less than ideal and can create a welcoming environment for insects and water leakage. If you notice any of these issues, it’s important to address them right away, as even a small gap in your siding can allow water and pests into your home.
While hiring a professional to repaint your siding may seem like the most prudent option, this project is quite doable for homeowners who are willing to tackle it. It just takes a little prep work to make sure you get the best results.
If you notice your vinyl is fading, it’s likely time to repaint it. This can also be a sign that the waterproof layer is wearing away, which could lead to leaking and mold growth. This can be more serious and will require a more extensive repair.
To repaint a vinyl panel, first remove it from the nails and screws holding it in place. You can use a pry bar, hammer, or drill to do this. Once the panel is free, slide a zip tool underneath to unhook it from the panel above. Once you’ve removed the damaged section of vinyl, use a zip tool to lift up the course above. Using the same technique, you can then pull up any nails holding that piece to your house and remove it.
Before attempting to repaint, it’s important to clean the surface of your vinyl siding with soap and water to ensure that the new paint will adhere well. It’s also a good idea to lightly sand the area, starting with 100-grit and then moving up to 220-grit. Once you’ve sanded, be sure to wipe the sanding dust away with a damp cloth.
Once you’ve cleaned the damaged area, cut a section of scrap vinyl that matches your existing siding to the size of the hole or crack. Trim the curved edges of the vinyl patch so that they match up with the curves of your damaged panel. Then, apply a bead of caulk around the hole or crack to secure it in place and prevent moisture from seeping in. Once the caulk dries, be sure to touch it up with exterior paint that matches your home’s color.