Tag: home renovation

A Step-By-Step Guide to Refinishing Kitchen Cabinets Like a Pro

San Jose Cabinet Refinishing

San Jose Cabinet Refinishing your cabinets is an investment, and the right finish can enhance style and durability. The best finishes withstand daily use and stand up to moisture, heat, and dust.

The first step is meticulous surface preparation. Using a degreaser helps remove grease and grime, and scuff sanding improves paint adhesion. Be sure to label cabinet doors and hardware before reassembly.

Preparation

If your cabinets are in good shape but have a dark finish, lightening them with a fresh coat of paint will brighten your kitchen. However, before you get started painting, it’s important to properly prepare the surfaces so the new finish adheres well and looks flawless.

Start by removing the cabinet doors and hardware from their hinges, and setting them aside. Label each door front with a piece of tape and a number so you can return them to the right place when you’re done.

Next, you’ll want to clean the cabinets using a degreaser like Simple Green (which we sell in our store) or a commercial product to remove any food residue and other dirt from the surfaces. This will ensure your new finish adheres to the cabinets and helps it last longer.

Once the surfaces are clean, it’s time to sand them lightly. A medium-grit sanding sponge or a random orbital sander will help you scuff up the existing finish, giving it some “tooth” for better adhesion to your primer and later paint. Once you’re finished sanding, vacuum and tack-rag the area to remove any remaining dust particles and ensure the surfaces are completely clean and ready for the SVT process.

Before you apply a new coat of paint, it’s a good idea to caulk any cracks around the cabinet edges and crown molding. This will prevent water from seeping into the cabinet box and causing problems down the road.

When you’re ready to begin priming, use a high-quality acrylic primer like KILZ 3(r) PREMIUM Primer. It offers superior adhesion to protect your paint job from chipping and peeling, plus it has mildew resistance for moisture-prone areas like the kitchen. Make sure the primer dries completely before you continue.

Primer

Painting kitchen cabinets is not a small or inexpensive project, so you’ll want to make sure your first coat of primer is high-quality. A great primer will ensure excellent adhesion and can be tinted to match the shade of your cabinet paint for a perfect color transition.

If your existing cabinets are painted, it’s important to sand them before priming. If you don’t, the second layer of paint may not adhere well to the surface and can chip or peel over time. For the best results, use a light-weight grit sandpaper, such as 220-grit, to get rid of any bumps or dips. You should also wipe down the surface with a damp cloth to remove any dust, grease or other debris.

A quick tip for the primer step: if you’re making a dramatic color change, it is best to tint your primer to match your cabinet paint rather than using an exact shade. This will help you achieve a much more even color on your cabinet doors and drawer fronts.

For a timeless look, pairing natural wood tones with vibrant painted cabinets can create an elegant and sophisticated aesthetic. If you decide to go this route, start with a good quality primer that promotes adhesion and is formulated for use under oil-based topcoats, such as BIN Shellac Primer. This product is compatible with both water-based and oil-based paints, so you can choose the type of finish that is right for your space.

One of the biggest mistakes DIYers make is skipping this step and applying paint directly over existing cabinets without a proper primer. This can lead to bubbling, cracking and other issues over time. To avoid this problem, use a degreasing cleaner such as Krud Kutter or TSP to thoroughly clean your cabinets before you apply the primer.

A final tip for this stage of the process is to number each cabinet door or drawer front before you remove them from the frame. This will ensure that you know which piece goes where when it’s time to reassemble them. This system is especially helpful if you’re working with older cabinets that might have some chips or other imperfections in the wood surface.
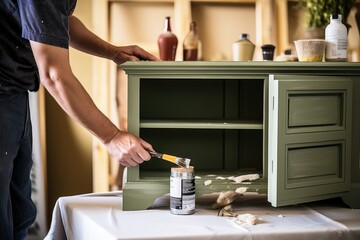
Paint

Whether your cabinets are dark or dingy, a fresh coat of paint can brighten and transform your kitchen. While refinishing can be a DIY project, you may prefer to hire a professional for a complete cabinet makeover. If your cabinets are in good structural condition, a new finish can refresh the look of the entire room for less than the cost of buying new furniture.

Before you start painting, remove all hardware and label each piece to ensure you can reinstall it once the cabinet doors are back in place. Set aside the screws, hinges and other small parts in a safe spot where you can find them again later. Also, remember to cover countertops and appliances so they don’t get dirty throughout the refinishing process.

Clean the cabinets thoroughly before applying any primer or paint. A degreaser works well to cut through grease build-up and create a smooth, clean surface for the products you’re using. If you’re refinishing cabinets mounted on the wall, use a gel or semi-paste stripper to remove the existing finish. This type of product works better for vertical surfaces and won’t drip as much as a liquid stripper.

Once the cabinet surfaces are clean, lightly scuff sand the surfaces to promote paint adhesion and remove sheen from the wood. Vacuum and tack-rag the areas to remove any dust and residue. After the sanding, it’s a good idea to caulk any cracks where the cabinet meets the walls or crown molding. Allow any caulk to dry completely before proceeding to the next step.

Before refinishing your cabinets, decide on the color and finish that you’d like. If you’re going with a light, airy style, white and ivory paints are popular options for cabinets. If you want something more colorful, try a soft blue or green shade to brighten the space.

Once the cabinet paint has dried, it’s time to reinstall the cabinet doors and drawer fronts. Reattach the hinges and screws with hand tools instead of power drills to prevent stripping. If you’re replacing the cabinet hardware, this is a great time to shop for a new style. Matching knobs and pulls can give your cabinets a sleek, polished look. Or, opt for non-matching or unique hardware to add some personality to your new kitchen.

Finish

It’s important to take this step carefully and to do it right. Removing your cabinet doors and drawer fronts is key to making this a successful project (and avoiding the mess of sanded kitchen cabinets in piles on your living room floor). It’s also the only way you’re going to be able to effectively paint both sides of the door and all of its edges. This may seem like a huge pain, but trust us, the end result will be worth it.

Once your surfaces are clean and dry, apply a primer that’s suitable for cabinet paint such as Sherwin Williams’ Extreme Bond Primer. This primer is formulated with superior adhesion and provides a smooth base for your final paint application.

As with the sanding step, it’s crucial to follow the directions on your primer and to work in a well-ventilated area. When you’re ready to begin painting, use a high-quality foam brush or a paint roller for the flat surfaces and a small paintbrush for any edges you need to tackle.

It’s best to work in smaller sections if you have multiple cabinets to paint, so as not to get your hands messy and to be able to finish each section before moving on. Let each coat of paint dry at least overnight, but two or more days is better. Once everything is completely dry, you’re ready to reinstall your cabinet doors and drawer fronts.

What Do Deck Builders Do?

decks

Deck Builders Lexington KY turn design concepts into durable, safe, and visually appealing outdoor spaces. Their expertise enables homeowners to enjoy their outdoors while adding to home value and lifestyle.

Professional deck contractors are familiar with local building codes and permitting requirements, ensuring that your deck is compliant. They also have access to the best materials for your project, balancing durability and cost.

Designing

Building a deck seems straightforward, but the reality is that it’s a complex project. Eager homeowners often jump right into construction without considering crucial details. Where will the sun hit your yard throughout the day? What’s buried beneath your proposed deck location—utilities, septic lines, drainage systems? Taking the time to evaluate and plan a structure before breaking ground ensures that the finished product will add value to your home and enhance your outdoor living experience.

Professional builders know all the ins and outs of local codes, structural requirements, and materials, ensuring that your new deck is safe, durable, and built to last. A skilled contractor also understands the best way to construct each phase of your deck, reducing construction time and eliminating costly mistakes that come from trial and error.

Decks are one of the most popular home improvement projects because they can significantly boost property values. They’re also a great place to host family and friends, and provide a comfortable spot for relaxing. While a deck is a major investment, it can quickly pay for itself in increased living space and reduced utility bills. A professionally installed deck can add up to 44 percent to your home’s resale value.

A successful deck requires a solid foundation. For large decks or ones that span over uneven terrain, poured piers are the best footing. On-grade cement blocks might be cheaper, but they’re not as strong or long-lasting.

Framing is another critical aspect of a well-built deck. Builders use a variety of framing strategies depending on the design and material used for your deck, but all quality decks are supported by beams that connect to posts and the ledger board. Professional builders choose the best joist spacing for rigidity and longevity, including using fasteners with built-in corrosion protection like Grip-Rite’s copper deck flashing or Termite Shield.

A functional and beautiful deck should be built around how you’re most likely to use it. If you entertain guests frequently, a dining table or bar might be more useful than a grilling station. Adding an outdoor kitchen can expand your cooking options and encourage people to spend more time outdoors. And, for those with limited space, a spiral staircase can be a fun and functional addition.

Permits

If you’re thinking of replacing an existing deck or extending it, or adding features such as a hot tub or built-in barbecue, a permit may be required. Building permits are typically granted by local governments and are based on specific construction regulations in the International Residential Code (IRC), though those provisions can be subject to local interpretation and regulation. If you’re considering hiring a contractor, check with them directly to ensure they’ll be seeking the necessary permits before work starts.

While some projects, such as window or water-heater replacements, are exempt from the need for a permit, a new deck will almost certainly require one. In addition, any work that interferes with a home’s zoning laws may need to be permitted, too. Those who undertake work without a permit risk fines and even having to dismantle the structure if caught.

The permit application itself may be a simple form or a document that includes a plot plan with dimensions and details of the deck, as well as cross-section views showing the deck’s footings, beams, joists, and railing. Some cities also require engineering of decks to ensure they’re safe, especially in seismic zones. Permits can be denied for a number of reasons, including if the plans aren’t complete or if the deck’s size exceeds allowed limits.

Some localities also regulate construction within certain distances from property lines to prevent flooding and preserve wetlands. In densely populated areas, storm-drainage systems are carefully engineered to ensure that each home works with the overall system, and any construction that could disrupt this may be subject to a review by municipal civil engineers.

In some cases, the city can catch unauthorized construction through neighbors’ reports or annual property tax assessments and demand that homeowners dismantle their illegal additions. Even if you don’t get caught, your homeowners insurance may not cover any damage caused by unpermitted construction. Fortunately, many professional contractors will take care of seeking the permits and complying with local regulations, so there’s no need to take unnecessary risks when hiring someone for your deck project.

Materials

Professional builders know what it takes to build a deck and understand that the materials used can impact its longevity. Choosing quality, durable materials helps your deck last longer, reducing maintenance costs and adding value to your home. Deck builders also understand how different materials perform in your climate and can recommend the best options for your lifestyle, budget, and aesthetics.

During construction, skilled professionals use specialized tools to ensure a flawless finish that is free from gaps or misalignments. This precision eliminates costly mistakes that can result in future repairs and maintenance issues. Professionals also handle all permits and materials coordination, making the process smooth and efficient. Professionals also provide a clear timeline, so you can know when your outdoor space will be ready to enjoy.

When choosing a deck building contractor, be sure to ask friends, family members, and neighbors for recommendations. Also, talk to local lumberyards and other decking material suppliers. It’s in their interest to recommend reputable contractors, so they may be able to provide you with referrals. Finally, explore online directories and review websites to find a local professional with the right experience and reputation.

In addition to delivering high-quality decks, professional builders are knowledgeable about local building codes and regulations. They avoid common construction pitfalls and adhere to ever-changing zoning laws. This translates to a deck that’s safe for you and your guests and that meets all structural requirements.

When it comes to selecting decking materials, experienced builders can recommend the best options for your needs and budget. They also understand how to properly install the joists and beams that support the deck, ensuring structural integrity.

A well-built deck is a wonderful place to relax or entertain. It can accommodate dining or sitting areas, a grill station, and a fire pit. You can even add a water feature to create a tranquil oasis or a screen for watching your favorite sports team play.

A deck is a great way to enhance your home’s curb appeal and increase its market value. It’s a versatile space that can be enjoyed by families, friends, and pets. In addition, it can improve your view and add more living space to your home.

Installation

After all the footings, framing, and joists are in place, the deck begins to take shape. This is a fun and exciting part of the project, and it’s where homeowners can begin to express their design aesthetics. There are a variety of different materials available to choose from, as well as construction choices such as hidden fasteners and composites that can help reduce maintenance time and expense.

The pros can also assist with adding additional features to your deck. They’ll consider factors like how the space will be used and if you want to incorporate other elements such as a pergola or an outdoor kitchen. It’s important to talk with your contractor about these details early on in the process, so that they can make suggestions and handle any permitting issues ahead of time.

Hiring a professional will help to ensure that your deck is built correctly, and will last for many years to come. They will know the proper building codes, setback requirements, and permits that may be required in your area. Additionally, they will be able to identify potential challenges early on and address them before they become expensive problems down the road.

Another benefit of working with a professional is that they have access to specialized tools and materials that the average homeowner doesn’t. This can save a lot of time and money in the long run, especially when it comes to things like cutting custom pieces or creating unique designs.

As a final note, professional contractors will be able to provide you with better warranties than someone who does the work as a hobby on the side. For example, a TrexPro is able to offer labor warranties of one to 12 years, depending on their level of certification and the products that they use. In addition, they have a knowledge of installation guidelines and best practices that the average person does not. This can further extend the life of your deck and increase its value as a home renovation. A recent study found that a new deck can raise your home’s value by up to 72 percent. This is far more than the amount that can be recouped from other common home improvements such as a bathroom or living room.