Featured Image Source: EuroCraft Interiors Custom Cabinetry
A well-made backsplash is a fundamental accessory in the kitchen, preventing possible damage and unwanted traces of years of usage can bring.
Notwithstanding, quality needn’t come at the penance of eye-appeal, and today’s interior designers are moreover driving the charge on high-quality kitchen backsplashes that deliver just as they look.
The stainless steel backsplash explicitly gives an outstanding modern sheen, while keeping your kitchen in top structure.
There are various types you can select from. Your choice will largely depend on your personal preferences, along with your culinary needs. Stainless steel backsplash tiles are a well-known choice because of its splendid brilliance and simple to clean convenience, while copper and brass backsplash age with rustic appeal after some time, reminiscent of an old-aged tavern.
On the other hand, hammered metals are also standing out due to their distinctive uniqueness, and are perfect for the smaller kitchen in need of an outstanding focal element. Regardless of your design decision, your kitchen experience will never be the same with our top stainless steel metal backsplash ideas.
The kitchen is a consistently evolving area in our home, where convenience and development are top priorities. But no matter how modern it could get, still one thing remains—that the kitchen is the heart of the home.
.fusion-fullwidth.fusion-builder-row-85 { overflow:visible; }
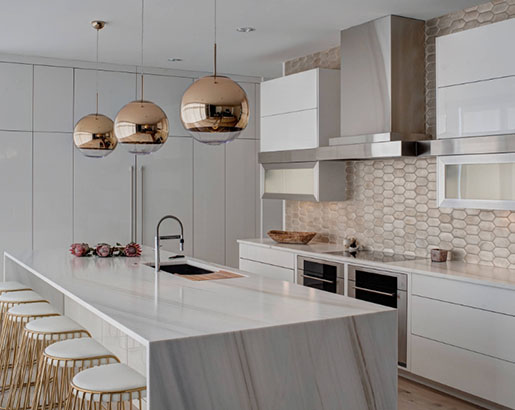
STAINLESS STEEL
LLOY Solid Metal Tiles
Ubiquity tile in brushed stainless steel as a backsplash.
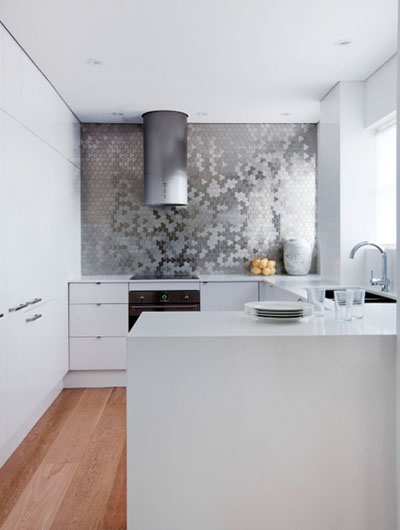
MINIMALIST
Lankford Design Group
Clean and functional for this lovely kitchen.
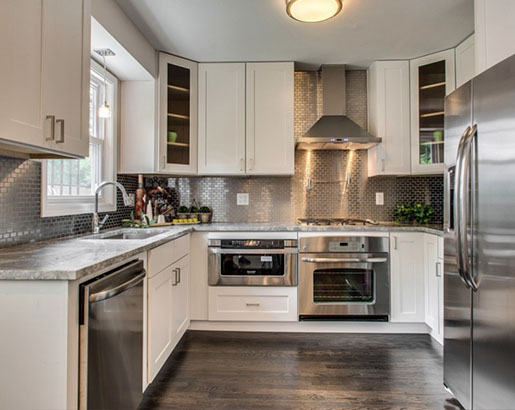
TRANSITIONAL
FourSeasons MetalWorks
Backsplash with integral stainless steel sink by FourSeasons MetalWorks.
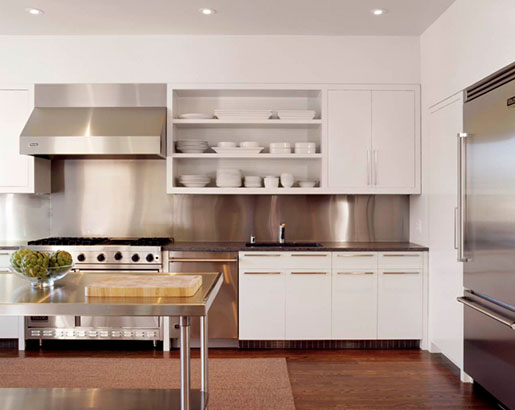
TRADITIONAL
Design Concepts by Jean
Beautiful stainless steel tile backsplash from Mohawk.
CUSTOM-BUILT
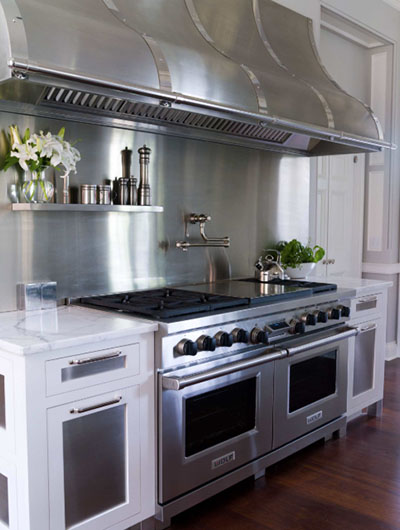
Vicente Burin Architects
Stainless steel finishes in both polished and brushed for the cabinets, hardware, hood, range, and backsplash.
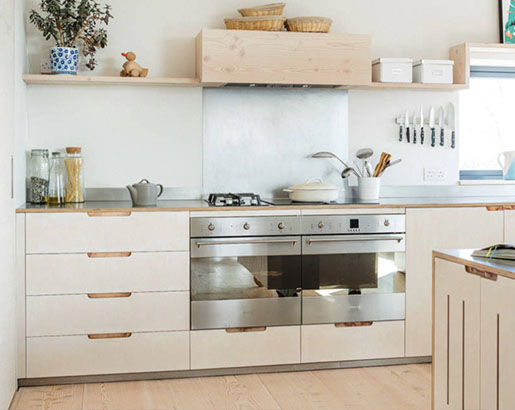
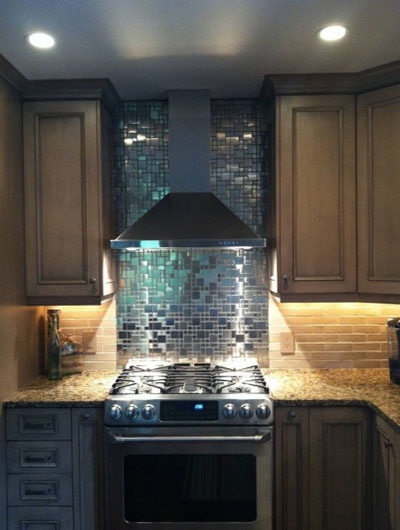
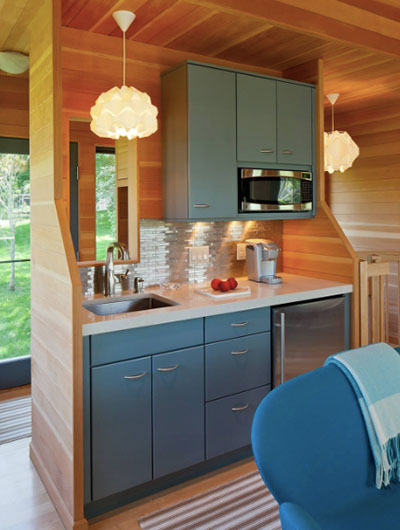
RUSTIC
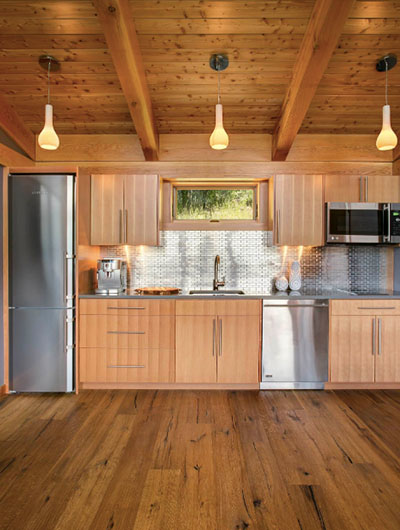
FabCab
Lovely backsplash tile in 1×3 stainless steel mosaic.
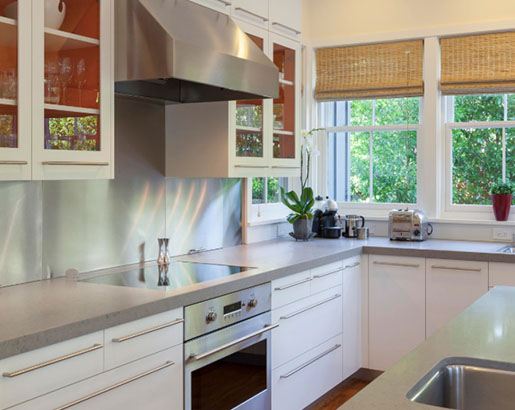
STEEL + PLYWOOD
Sustainable Kitchens
Brushed stainless steel sheet backsplash bonded with plywood.
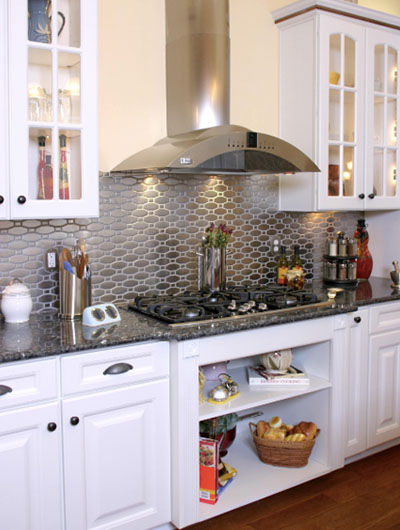
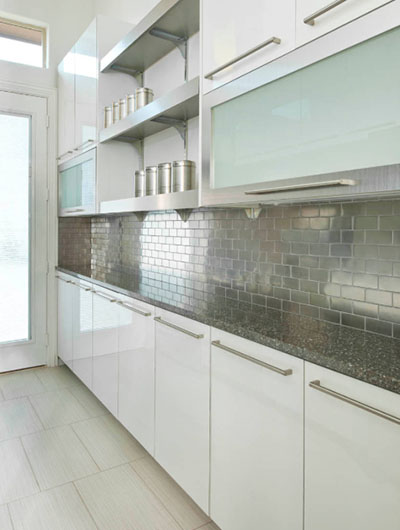
URBAN KITCHEN
Cary Bernstein Architect
Seamless backsplash made by a custom metal fabricator.
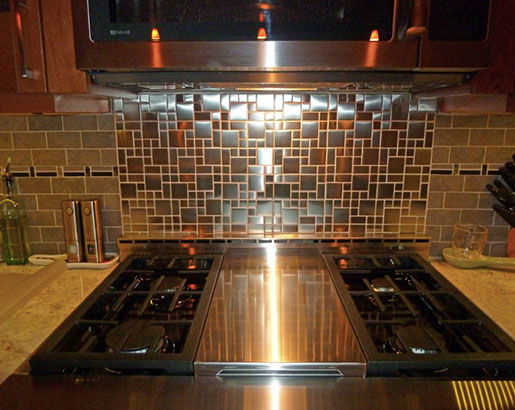
METAL MOSAICS
Steele Consulting Group
Stunning granite counters with stainless steel metal backsplash.
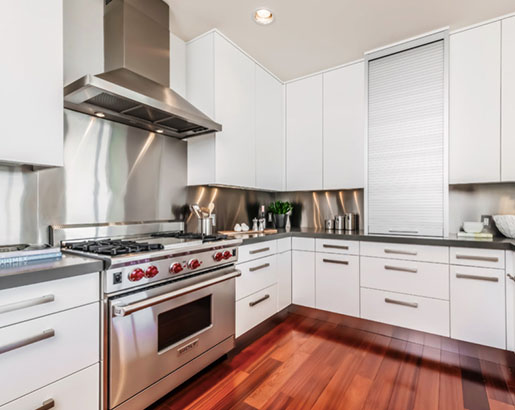
CONTEMPORARY
Robin Rigby Fisher CMKBD/CAPS
Attractive and functional backsplash for this contemporary kitchen.
Why Use Stainless Steel
There are many reasons that will make you prefer stainless steel for your backsplash. Here is the rundown:
First, a stainless steel tile backsplash is affordable. Stainless steel has that smooth contemporary look that everyone’s searching for. In some cases, its modern appearance makes individuals feel that it is costly. When in fact, it is inexpensive compared with stone backsplash.
Next, it is durable and long-lasting. This material is appropriate for those who love dependable items. Its capacity to decrease the risk of mold makes it more sturdy. Aside from that, its metallic appearance is fascinating to behold.
Moreover, stainless steel backsplash sheets are relatively easy to install. Most of the time, we need to contract an expert to install backsplash. When it comes to its installation, it is a lighter that is easy to install. In fact, you do not need to hire a professional because you can DIY it. Thus, you get enough savings that you can use for something else.
Finally, a stainless steel stove backsplash makes you spot dirty surfaces easily. Not only that its smooth surface causes you to find messy spots effectively, but this material also gives a surface that won’t enable stains to remain. With a cloth and warm water, the spots are no more. Another method to clean your stainless steel kitchen backsplash is through using vinegar or baking soda.
COBBLE PATTERN
Eden Mosaic Tile
Inspired by the cobblestone streets of Europe, this metal mosaic stainless steel tile features three different sizes of tile.
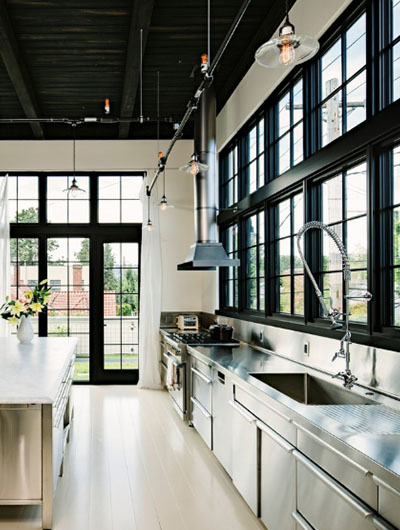
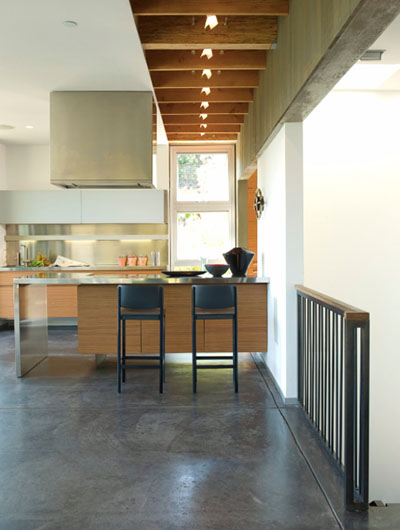
INDUSTRIAL
Pause Designs
Stainless steel sheet for the backsplash in this industrial kitchen.
METAL BRICKS
Jamie Laubhan-Oliver
Premium stainless steel brick metal mosaic for the backsplash of this contemporary kitchen.
GLOSSY
Exceptional Frames Photography
Backsplash in stainless steel for easy and fuss-free cleaning.
Tips On Decorating Your Kitchen
Concentrate on a room’s primary highlights like the pattern and shape of the backsplash, or the furniture’s straight lines or breathtaking subtleties. In case you’re going for a country effect or rustic, go for pieces that appear as they originated from the wild like hammered stainless steel in a glossy silk finish.
On the other hand, make a timeless and classic Scandinavian design by going for a shiny stainless steel metallic tile in a simple interlocking mosaic pattern or a linear stripe. Maintain a mellow mood with extra minimalist subtleties and finishes, such as unhampered windows, uncovered wood components, and pale gray textures.
When you’re handling a bathroom or kitchen makeover, it’s smart to begin with a standout component like decorative tile, and then choose materials to counter and complement it. For example, stainless steel metal tile goes well with a kitchen-savvy porcelain floor tile that looks like concrete.
Meanwhile, you can create lavishness in your home with classic architecture by countering a fresh, timeless stainless steel tile backsplash with a blend of warm, complementary woods and metals.
Making a visual connection with a connecting space can be as simple as matching a stainless steel brick tile on the living room chimney or lounge area central divider with a stainless steel mosaic border on the kitchen backsplash. Utilize chrome table and seat legs, stainless steel backsplash with shelf, metal workmanship, and stainless steel appliances to spread in metallic vibe in your home.
A color theme can bloom naturally when you think about the structure’s inspirational elements. A neutral backsplash fits properly into such fragile structures by providing a dash of edginess for balance without interrupting the entire design.
CHECKER PLATE
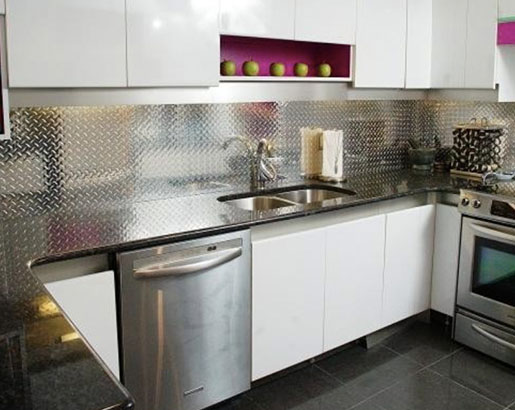
Ridalco Stainless Steel
The reflective effect of a metal backsplash will make your kitchen appear larger.
MODERN
Midland Cabinet Company
The stainless steel backsplash features two appliance garages, offering additional hideaway storage.
TROPICAL
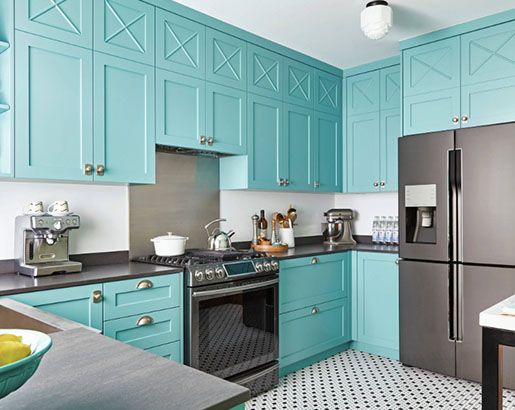
Toronto Interior Design Group
Metal sheet backsplash in this turquoise kitchen.
SHEET METAL
Webber + Studio, Architects
The stainless steel backsplash from Crippen Sheet Metal is stunning.
How To Install Stainless Steel Backsplash
Start by turning off the electricity to any outlets in the room you will work, then uninstall all the switch and receptacle covers.
Beginning toward one side of the wall, tape the Kraft paper to the end. Next, unroll the paper along the divider, taping it securely as you move along.
When the whole backsplash region is secured, utilize your utility knife and cut the top and base of the paper to fit firmly into the backsplash zone. Then, cut out the openings for every one of the switches and receptacles.
Now cautiously get rid of the Kraft paper template. You would now be able to utilize this template to arrange your new backsplash.
While you are waiting for your new backsplash, take the opportunity to clean the wall to get rid of any remaining dirt or grease and afterward sand it to offer a decent gripping surface for the construction adhesive.
Now we move to how to install stainless steel backsplash. Installation starts by covering the counter with newspaper to avoid the sharp edges of the backsplash from cutting or scratching the counter surface.
Next, put the construction adhesive to the back of the backsplash. With the caulking gun, run a bead then spread it out equally with the putty blade.
Position the new backsplash near the divider beginning toward one side, press it firmly against the divider. You can utilize a rolling pin to smooth the backsplash set up and expel any air bubbles.
Secure the backsplash by taping it until the glue has the opportunity to set up.
After the adhesive has dried, get rid of the tape and remove any adhesive marks utilizing alcohol.
Finally, caulk along the top and base edges of the backsplash, then sit back and enjoy your new backsplash.
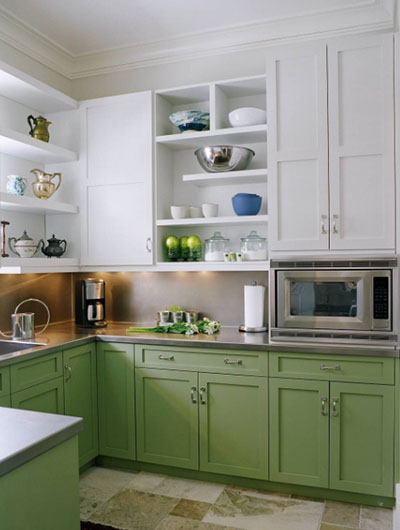
GREEN KITCHEN
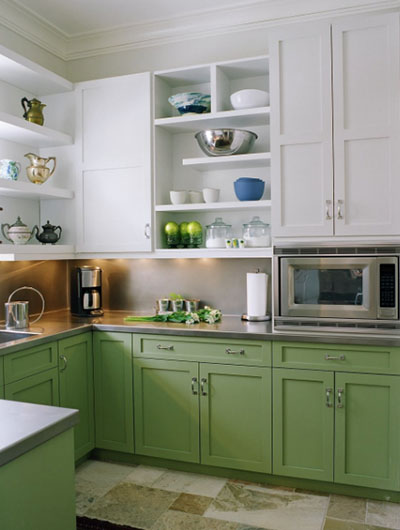
Hermitage Kitchen Design Gallery
Backsplash with integral stainless steel sink by FourSeasons MetalWorks.
ELEGANT
Frederick + Frederick Architects
The entire kitchen looks classy with its intricate details.
MEDITERRANEAN
VID Associates LLC
Stainless steel tiles from Antique Floors in Dallas, Texas.
EXCEPTIONAL
Emerick Architects
Custom stainless cabinetry with an integral sink and backsplash carry out the industrial theme of the space.
Stainless Steel Backsplash Ideas For Your Kitchen
Stainless steel in the kitchen is not only for refrigerators and stoves. Interior designers utilize stainless steel on everything from the ceiling to the floor. A backsplash is an engaging spot for stainless steel since it is sturdy and classy enough to be utilized in such an exceptionally noticeable spot, and there are an assortment of designs, so you can generally find the correct style for your very own space.
Tile
Stainless steel tiles integrate the look of conventional tile with the shine of stainless, which makes it ideal for about any style or theme. Stainless steel backsplash tiles come in similar sizes that you can expect with porcelain or ceramic tile. The size of tile you pick relies upon the style of your house. Small, square mosaic tiles work when you need to add a touch of texture to the your space, while subway tiles look perfect in a room that is more conventional.
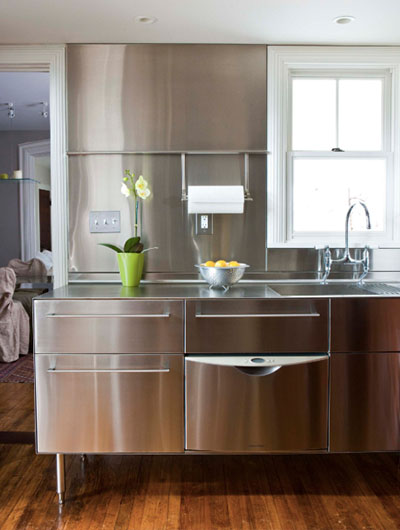
Brushed Steel
A single sheet of brushed stainless steel lights up the region without indicating every finger marks and showcase that polished stainless steel can appear. A metal contractor can cut a single piece of stainless steel to cover the whole space from the counter to the cupboards, giving you a spotless, seamless appearance that is ideal for any kitchen.
Patterned Sheets
You can stamp stainless steel sheets in an interesting texture to offer you the best of both worlds—the look of an intricate tile design without the grout and cracks that can accumulate gunk and dirt.
Diamond Plate
Diamond plate stainless steel has been utilized to protect truck beds and industrial spaces for quite a while, and there is no reason why you can’t use it for the kitchen.
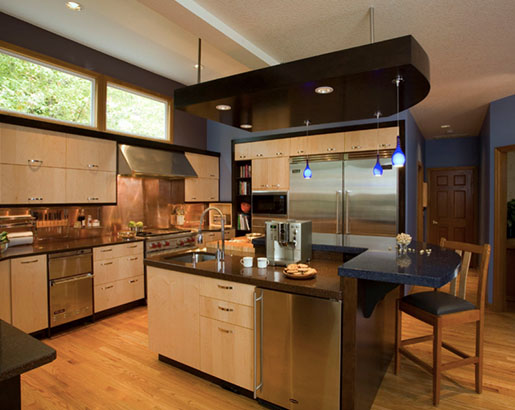
GOLD TONE
Schanstra Design Group
The stainless steel appliances and gold toned pendants, backsplash, and seating make a very lovely kitchen.
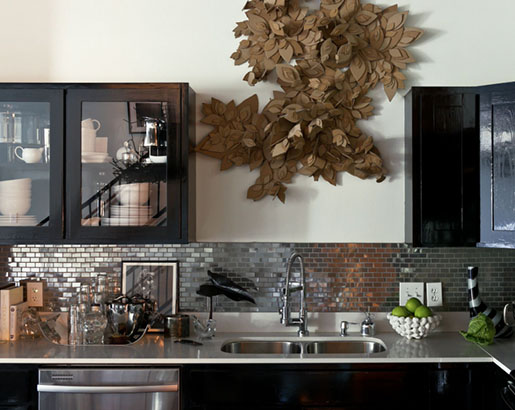
STAMPED FINISH
Gleicher Design – Architecture & Interiors
Stainless steel backsplash tiles in a stamped finish from Nemo Tile in Manhattan, NY.
URBAN METAL
Jordan Lotoski
The backsplash is a 1×2 stainless steel tile brick with gray grout.
TASTEFUL
Eden Mosaic Tile
The tiles in this sheet are mounted on a nylon mesh, which enables an easy installation.
EXQUISITE
Classic Kitchens & Interiors
The metal backsplash adds an attractive appeal to this rustic kitchen.
SWANKY
Suzette Sherman Design
We love how straightforward this kitchen looks.
How To Install Stainless Steel Backsplash
Start by turning off the electricity to any outlets in the room you will work, then uninstall all the switch and receptacle covers.
Beginning toward one side of the wall, tape the Kraft paper to the end. Next, unroll the paper along the divider, taping it securely as you move along.
When the whole backsplash region is secured, utilize your utility knife and cut the top and base of the paper to fit firmly into the backsplash zone. Then, cut out the openings for every one of the switches and receptacles.
Now cautiously get rid of the Kraft paper template. You would now be able to utilize this template to arrange your new backsplash.
While you are waiting for your new backsplash, take the opportunity to clean the wall to get rid of any remaining dirt or grease and afterward sand it to offer a decent gripping surface for the construction adhesive.
Now we move to how to install stainless steel backsplash. Installation starts by covering the counter with newspaper to avoid the sharp edges of the backsplash from cutting or scratching the counter surface.
Next, put the construction adhesive to the back of the backsplash. With the caulking gun, run a bead then spread it out equally with the putty blade.
Position the new backsplash near the divider beginning toward one side, press it firmly against the divider. You can utilize a rolling pin to smooth the backsplash set up and expel any air bubbles.
Secure the backsplash by taping it until the glue has the opportunity to set up.
After the adhesive has dried, get rid of the tape and remove any adhesive marks utilizing alcohol.
Finally, caulk along the top and base edges of the backsplash, then sit back and enjoy your new backsplash.
Four Benefits Of Using Stainless Steel Backsplash
Below are at least four reasons why you should choose a stainless steel backsplash:
1. Reasonably priced
Stainless steel provides that sleek, modern aesthetic that everyone desires. Its futuristic design sometimes leads others to believe it is pricey. In actuality, stainless steel backsplash is less expensive than stone backsplash.
2. Long-lasting and durable
Stainless steel backsplashes are easier to maintain than other materials such as wood or stone.
This material is ideal for individuals who want things that will last a long time. It is more durable due to its ability to lower the risk of mold growth. Aside from that, its shiny appearance is appealing.
3. Simple Installation
Sometimes we need additional cash to hire a professional to install backsplash. In reality, stainless steel is a lightweight material that is simple to install.
You do not need to have the assistance of a specialist because you do it yourself. This will assist you in lowering costs so that money may be dedicated to other priorities.
4. Visible Spots
Not only does its clear surface make it easy to see unclean spots, but it also provides a surface that prevents stains from adhering. The spots can be removed with a basic fabric and warm water. Another option is to use baking soda or vinegar to clean the surface.
This is an image roundup post, curated to showcase and promote other reputable contracting companies’ and their amazing work. To have any of the images removed, please reach out to us and we would be happy to do so.
Other Great Articles to Read:
TOP TRENDS IN KITCHEN BACKSPLASH DESIGNKITCHEN CABINET HARDWARE IDEASFLOATING KITCHEN SHELVING IDEAS
The post 29 Stainless Steel Metal Backsplash Ideas appeared first on Luxury Home Remodeling | Sebring Design Build.